

Customer Support
Our customers come first, if you have any questions we are here to help. Contact our Customer Care Team at: support et cleverpoint.pro
Our customers come first, if you have any questions we are here to help. Contact our Customer Care Team at: support et cleverpoint.pro
CleverPoint’ Product is intended to be used for research applications and personal use only. Our products are not sold as Medical Devices as defined in EU directive 93/42/EEC. Our products are not designed or intended to be used for diagnosis or treatment of disease.
Directives
2014/53/EU (RED)
2015/863/EU (RoHS)
Safety – RED, art. 3.1. a)
PN-EN IEC 62368-1 2020
EMC – RED, art. 3.1. a)
PN-EN 55032:2015-09
PN-EN 55035:2017-09/A11:2020-09
ETSI EN 301 489-1 V2.2.3 (2019-11)
ETSI EN 301 489-17 V3.2.4 (2020-09)
Radio – RED, art. 3.2
ETSI EN 300 328 V2.2.2 (2019-07)
RoHS
PN-EN IEC 63000:2019-01
Declaration of Conformity
Hereby, CleverPoint Sp. z o.o. declares that the radio equipment CleverPoint 4 complies with the requirements of the European Parliament and Council Directive 2014/53/EU of 16 April 2014 on the harmonization of the laws of the Member States relating to the making available on the market of radio equipment and repealing Directive 1999/5/EC.
CleverPoint does not provide any warranties, guarantees, or representations regarding the contents of this document. The information is offered “as is” with no explicit or implied warranties, including but not limited to, warranties of merchantability, quality, and ownership. CleverPoint retains the authority to modify the contents of this document as well as the features or functions of its products and services at any moment, without the need to inform anyone of these modifications.
Copyright © 2024 CleverPoint. All rights reserved.
CleverPoint4 is a wearable technology integrated with VR, designed to collect and analyze users’ responses to VR content. It features neurofeedback, cardio-feedback functions, biometric sensors, and integration with VR headsets.
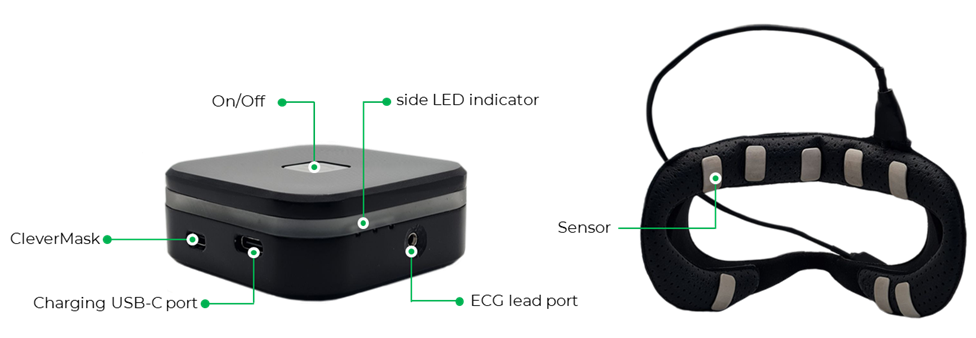
CleverPoint 4 is compatible with:
The current list of supported virtual reality headsets
CleverPoint 4 is compatible with:
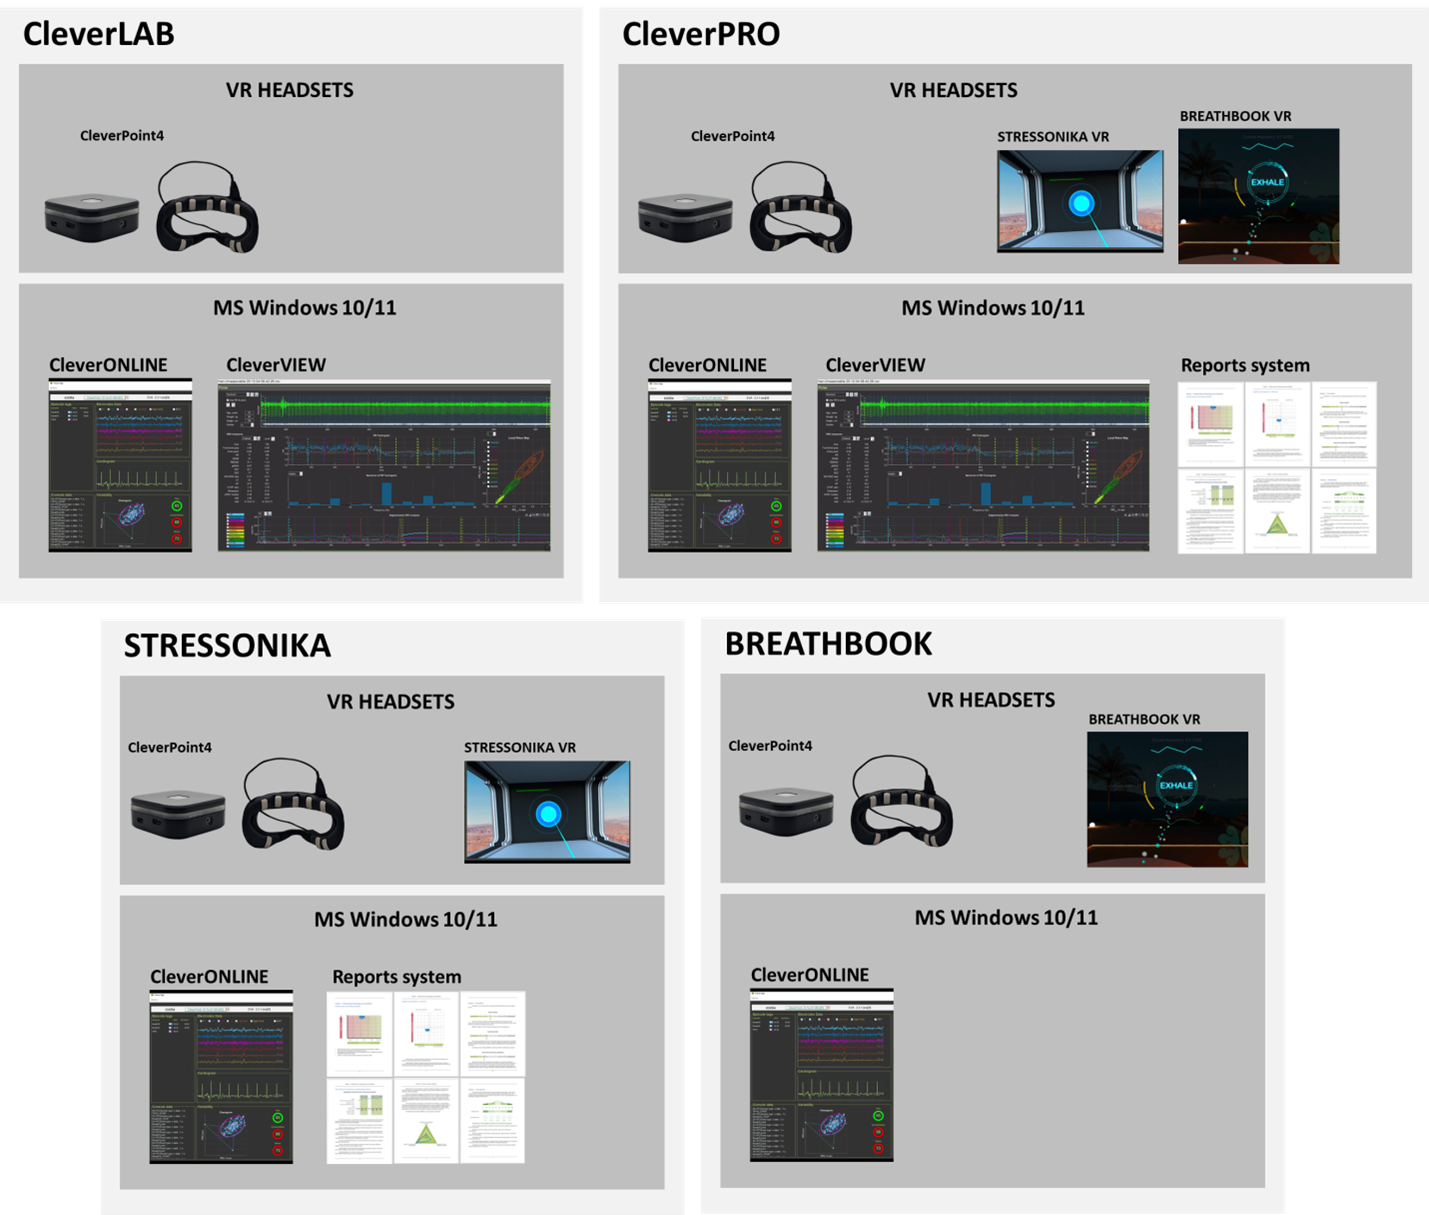
CleverPoint 4 is a consumer product; it is not intended to be used as a medical device or in hazardous environments.
CleverPoint 4 is designed for use at room temperature. Avoid subjecting CleverPoint4 and CleverMask to extreme temperatures, whether high or low. Be aware that extended exposure to sunlight can lead to the discoloration of certain components.
When not in use, protect CleverPoint4 and CleverMask from direct sunlight to preserve their appearance.
CleverPoint 4 is not waterproof. Ensure that both CleverPoint4 and CleverMask remain dry and are not submerged in water or any other liquids.
Handle CleverPoint4 and CleverMask with care, avoiding drops and protecting them from any sudden impacts.
Carefully remove CleverMask from the VR headset, avoiding jerks or bending the cable. Do not press on the electrodes or move them.
WARNING: CleverPoint 4 is powered by a lithium polymer battery that is rated for operation between +15°C and +50°C environments. It is not user-replaceable. If you suspect that there is a fault with the battery, please contact CleverPoint Support.
WARNING: Refrain from opening, disassembling, or attempting to repair your CleverPoint4 or CleverMask on your own.
WARNING: Do not charge CleverPoint 4 while the device switched on.
To clean the CleverMask, apply a small amount of medical alcohol to a cotton pad and gently wipe the entire surface of the mask, including the sensors. Use alcohol sparingly: simply dab with the cotton pad and lightly wipe the entire surface.
If CleverPoint4 is used individually, cleaning can be performed once a week.
WARNING: If CleverPoint4 is used by others, clean the CleverMask after each new user. It is also recommended to clean the inner surface of the VR headset that comes into close contact with the face.
Suggested hygiene supplies:
Microfiber cloth for wiping the VR headset lenses
Disinfectant solution for cleaning the CleverMask. Rubbing alcohol is recommended as the most optimal cleaning agent.
Cotton pads for applying the solution
Before each use, ensure all equipment is present, fully charged, and undamaged.
CleverPoint’s equipment:
CleverPoint4 device
Facial Interface with sensors CleverMask
ECG cable
ThirdParty’s equipment:
Disposable electrodes for ECG cable
VR headset
VR controllers (controllers operate on AA batteries)
Headphones (if used)
Laptop
Wi-Fi router for device communication
If any CleverPoint device, piece of equipment, or accessory is damaged, DO NOT USE IT. Contact CleverPoint Support for any damaged, malfunctioning, or inoperative equipment.
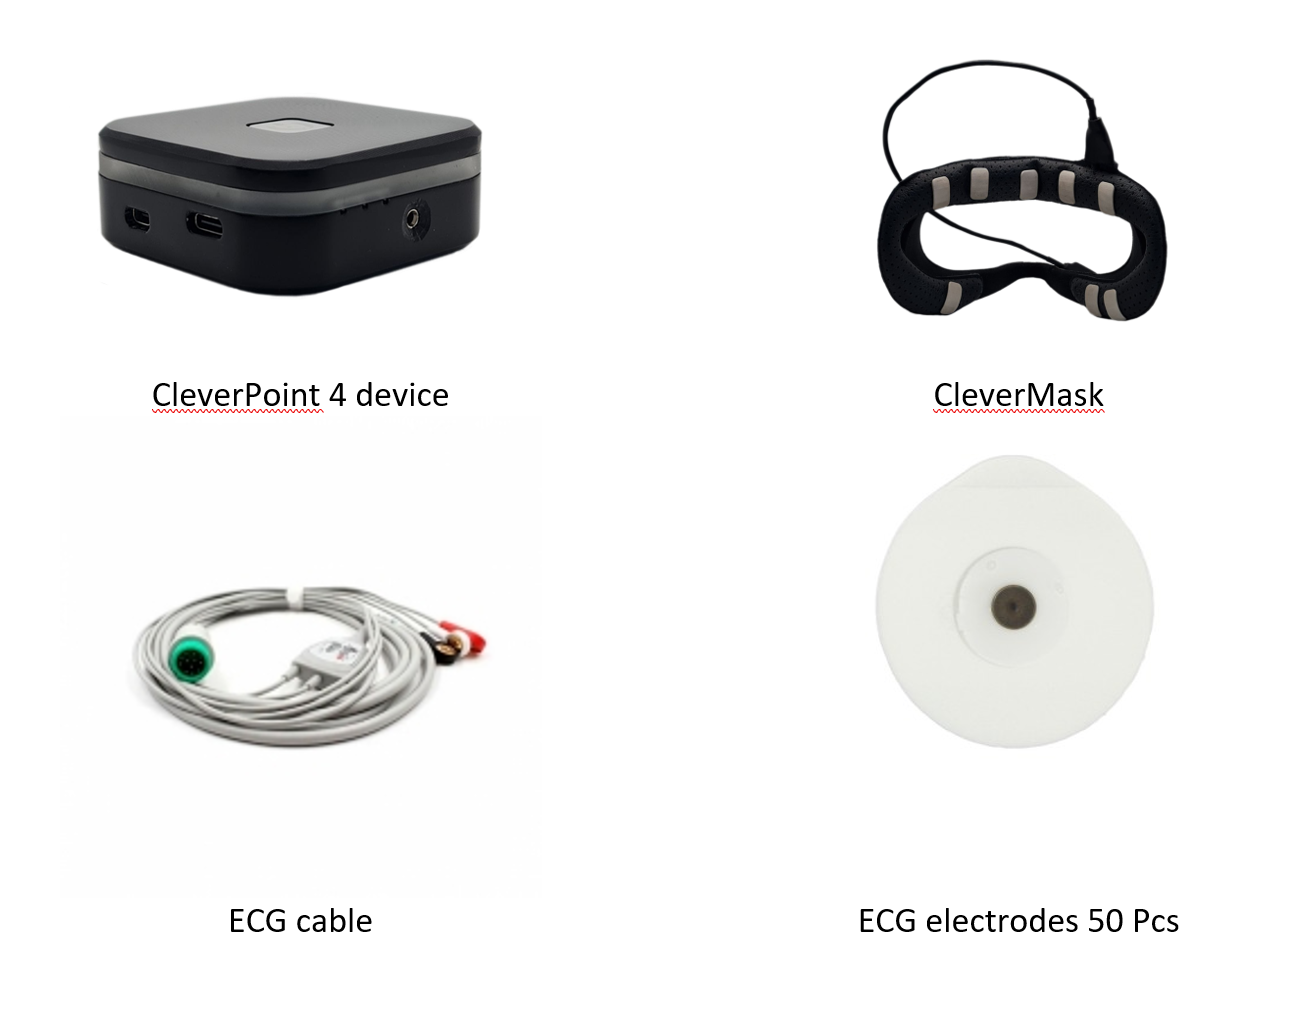
Before each use, check that all equipment is present, fully charged, and undamaged.
Hygiene supplies:
If any device, piece of equipment, or accessory is damaged, DO NOT USE IT. Contact CleverPoint Support if any equipment is damaged, malfunctioning, or inoperative.
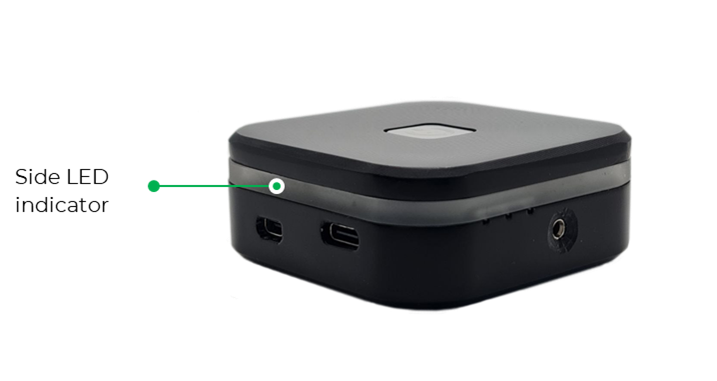
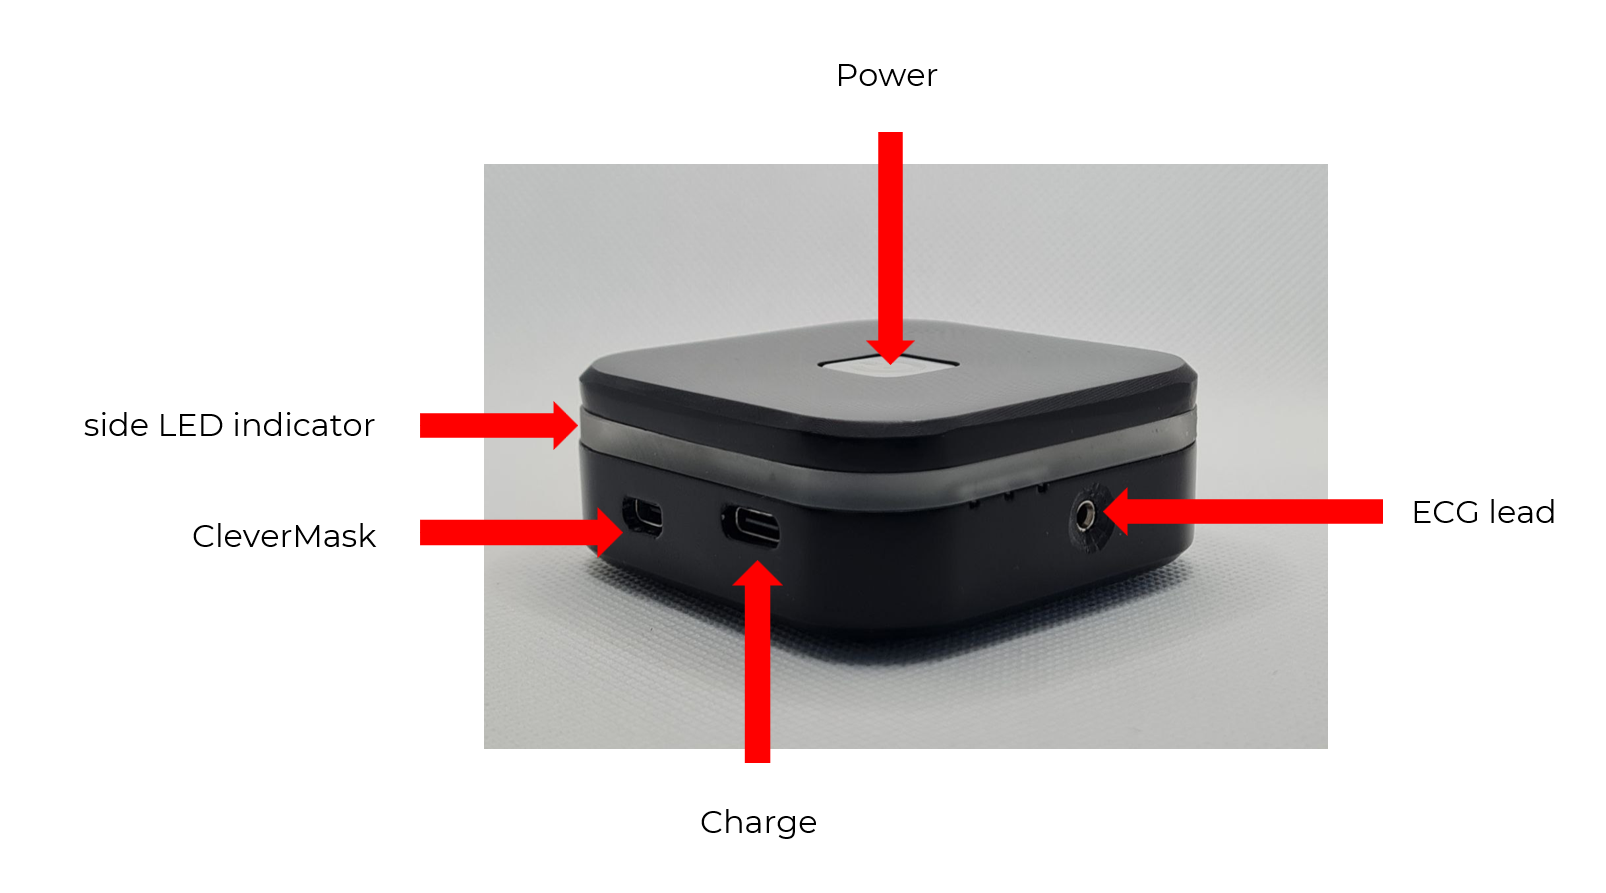
Color indication is present on the Power button and on the side LED illumination of the device.
Color Indication and Animation of the Power Button
The color of the button and its indication indicates the device’s operating mode:
Green Color – Wi-Fi mode
(mode selection is done in the software on the PC)
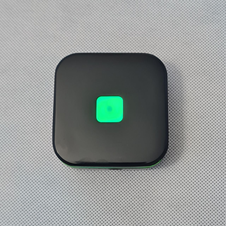
Blue Color – Bluetooth mode
(mode selection is done in the software on the PC)
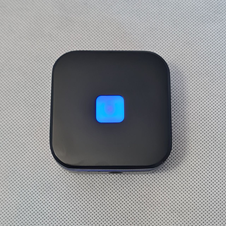
Flashes alternately in green and blue – Device Setup Mode
In this mode, you can connect to Wi-Fi network, update the device firmware, and change the device connection mode.
Color Indication of the Side LED Illumination
The color indication of the side LED illumination indicates the battery charge level.
Attention! If the charge is less than 20%, the side LED illumination will flash red 3 times upon turning on, and the device will shut down.
Animation of the Side LED Illumination
Your CleverPoint 4 is charged and tested before shipping — so you can start using it straight away.
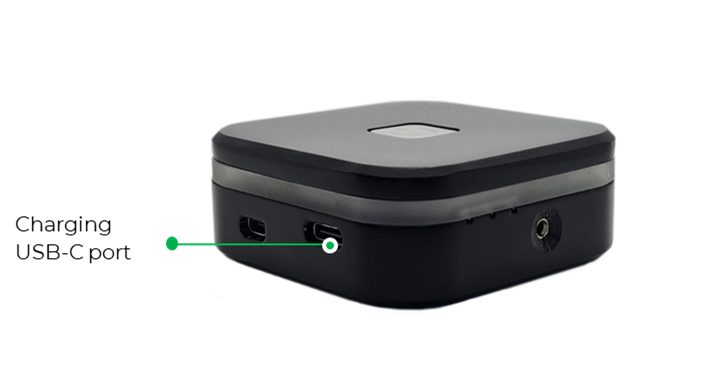
To optimize the use of your CleverPoint 4, we recommend that you fully charge it before making recordings.
To charge the battery, plug the USB charging cable into the USB-C port of the headset.
Then, connect the other end of the USB charging cable to a power outlet.
The length of time it takes to fully recharge your CleverPoint 4 depends on the remaining capacity of the battery. Charging can take several hours.
If you have any issues charging your CleverPoint 4, please contact the CleverPoint Support team.
The color indication of the side LED illumination indicates the battery charge level.
Green color – full battery charge >70%
Orange color – medium battery level 35%-70%
Red color – battery level below 35%.
Attention! If the charge is less than 20%, the side LED illumination will flash red 3 times upon turning on, and the device will shut down.
If the device is turned off and you need to check the battery level and the device’s connection mode, briefly press the device’s Power button:
• The color of the device’s button will indicate the mode of the last connection according to the Power button’s indication type.
• The color of the side LED indication will indicate the battery charge level according to the color indication of the side LED illumination.
• After 5 seconds of brief pressing, the device will turn off.
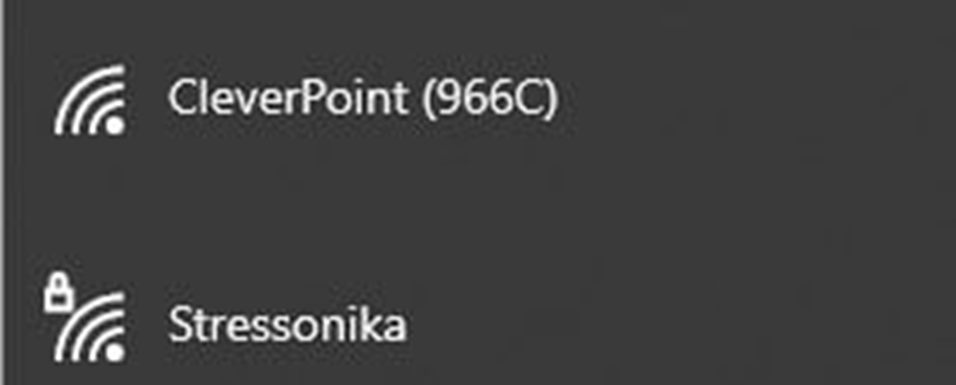
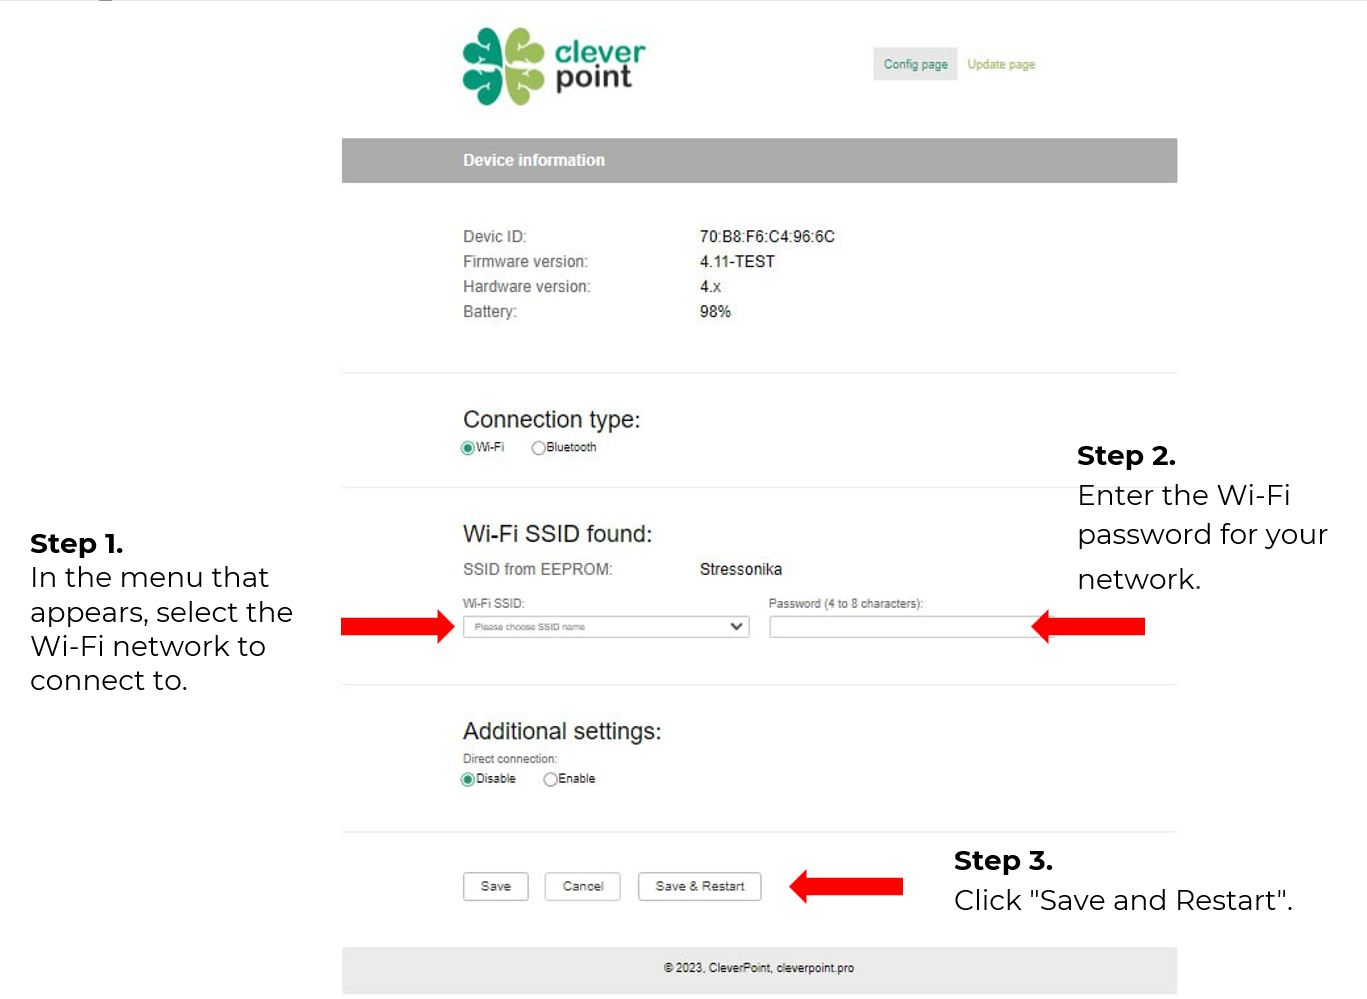
Attention! If after turning on the device, the Power button alternately flashes green-blue, then the CleverPoint device:
Press the Power button and hold it for several seconds until the side LED indicators flash 3 times in red and all the light indicators turn off.
Attention!
If for any reason you are unable to connect the device to the selected Wi-Fi network, please repeat the process: Initial setup of the CleverPoint V4 device to the used Wi-Fi network.
Attention!
If there are a large number of Wi-Fi networks (for example, when participating in an exhibition), there may be problems with connecting the device.
Recommendations:
– Use a separate router to set up your own portable Wi-Fi hotspot.
– Find a location where there is less Wi-Fi network congestion (e.g., step outside the exhibition area), and connect the device to the portable router. After this, you can return, and the device will work correctly.
The VR headset has a soft, removable face mask.
When using the CleverPoint device, you need to:
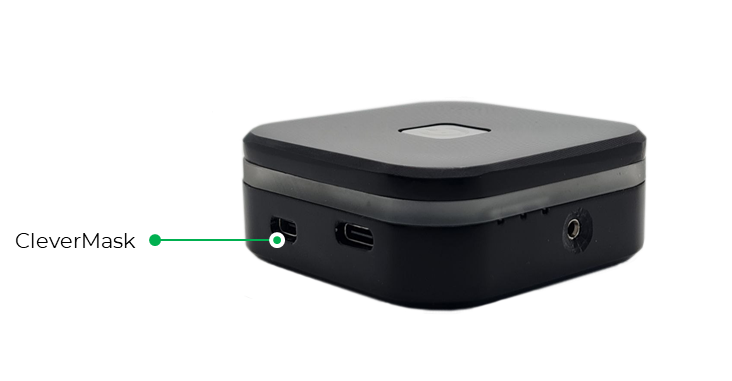
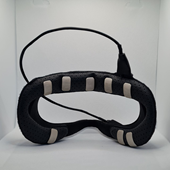
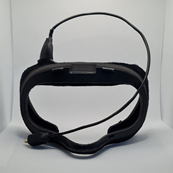
If the CleverPoint device is not being used, CleverMask can be replaced with the native mask for the usual operation with the virtual reality headset.
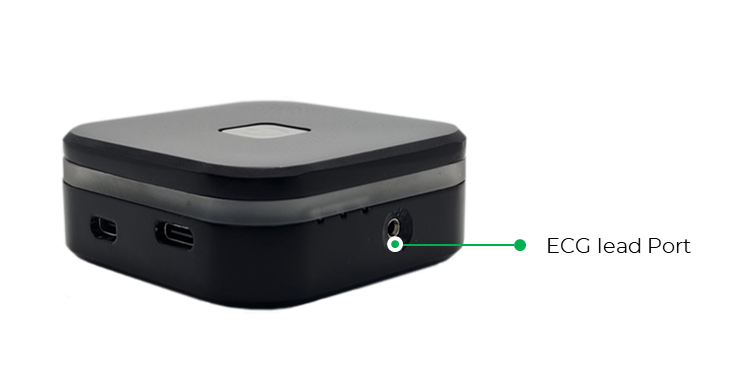
Connect the ECG cable included in the kit to the ECG port on CleverPoint 4.
Attach the cardio electrode to the left forearm or the back of the left hand, at any of the locations shown in the figure.
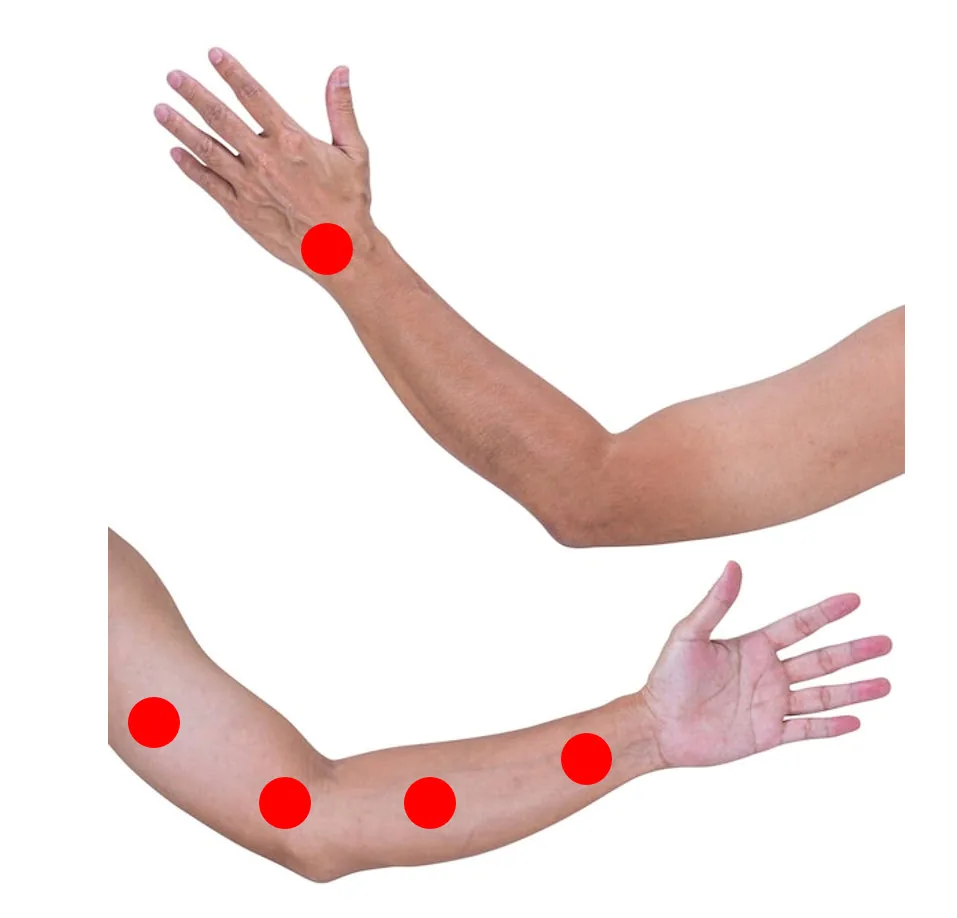
Placement of electrodes on the left forearm for right-handed individuals
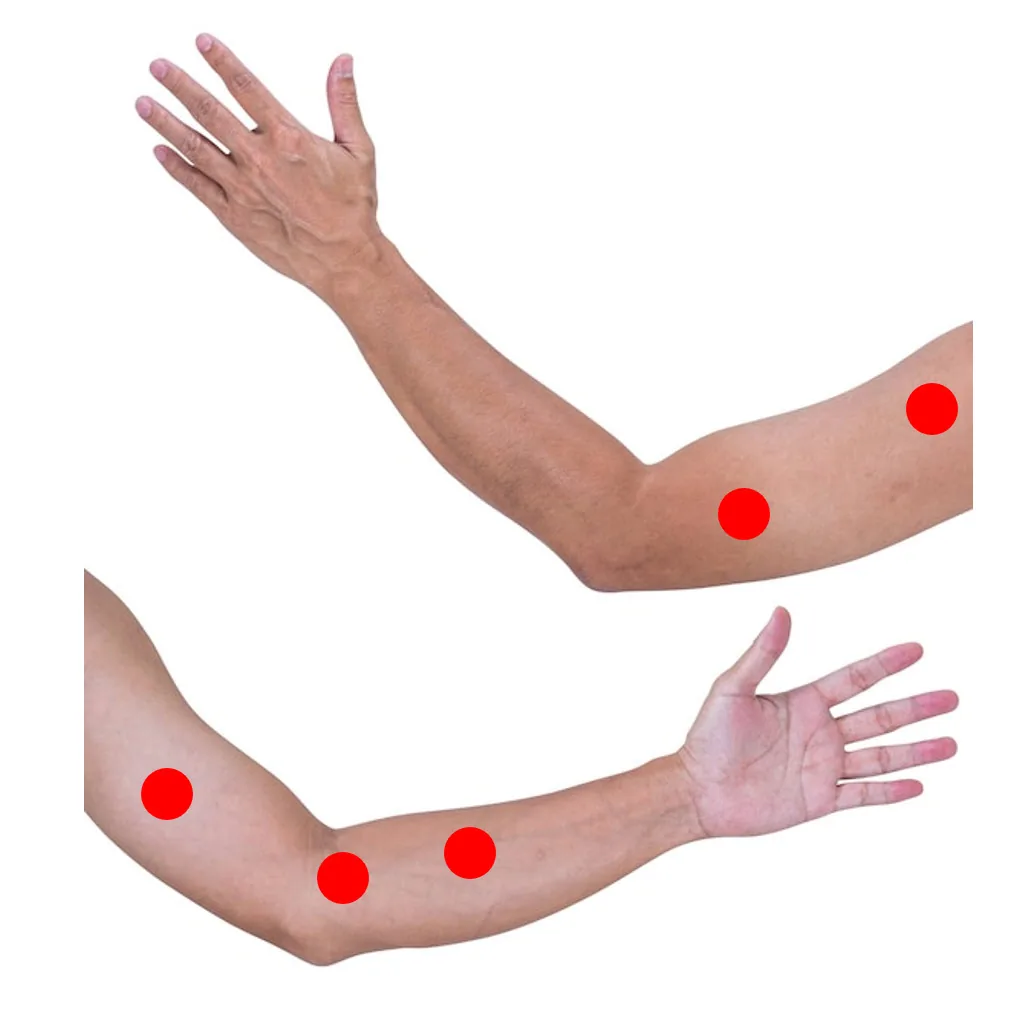
Placement of electrodes on the left forearm for left-handed individuals
Connect the ECG cable to the cardio electrode.
You are ready for recording and research.